
This post may contain affiliate links.
Make these easy sourdough discard crackers at home—crispy, healthy, and totally addicting. Skip the additives and enjoy real, homemade flavour.
I love a plate of crackers and cheese, but I want healthy and easy to digest.
These crackers are made of sourdough discard with no added flour. Technically they are a fermented food, so they’re easy on the stomach.
What is Sourdough Discard?
If you’re new to sourdough, you might be wondering what discard is or what to do with it. The Perfect Loaf is super helpful.
Sourdough discard is sourdough starter that has already gone through the fermentation process.
The flour and water mixture rises and peaks at its bubbliest state, then deflates to dormancy. This is when you remove (discard) some before feeding your starter again.
But isn’t that a waste? No, the thing I love most about sourdough is that nothing is wasted. Sourdough discard can be used for countless recipes, including these crispy crackers!
Easy & Crispy Sourdough Discard Crackers: You’ll Want to Double the Recipe

Why are these crackers so amazing?
- Tasty – They’re so delicious your kids will have you making them on repeat, so you’ll probably want to double, or even quadruple the recipe like me!
- Use up your discard – Ever find yourself with too much discard? Make these crackers and kill 2 birds with 1 stone.
- Gut healthy and nutritious– Made solely from sourdough discard, these crackers are a naturally fermented food that’s easy to digest. They skip the harmful additives found in store-bought products and instead feature wholesome fats and protein-rich ingredients.
- Diverse – They can be served on a charcuterie board, with soup, or even alone – they’re that good!
Easy Sourdough Discard Crackers: The Crispy Secret
Equipment
- baking sheet – 2 if doubling the recipe
- parchment paper
- measuring pitcher or bowl
- tablespoon
- cookie cutter – optional
- skewer – makes scoring easier
Ingredients
- 1 cup sourdough discard
- 2 tbsp butter melted and cooled to room temperature
- 2 tbsp coconut oil melted and cooled to room temperature
- 1/2 tbsp sea salt
- 1/2 tbsp herbs, cheese, seeds, etc. – optional
Instructions
- Preheat oven to 325°F.
- Line baking sheet with parchment paper.
- Melt the butter and coconut oil and let them cool to room temperature. Note: You may want to melt them separately to avoid burning.
- Combine sourdough discard, butter and coconut oil in a measuring pitcher or bowl and mix well.
- Pour the batter onto the prepared baking sheet. Lift the baking sheet one side at a time to let the batter slowly spread into an even layer – about 1/8" thick. Use a spoon if needed. Note: Thin batter makes crispy crackers!
- Sprinkle sea salt evenly over the mixture.
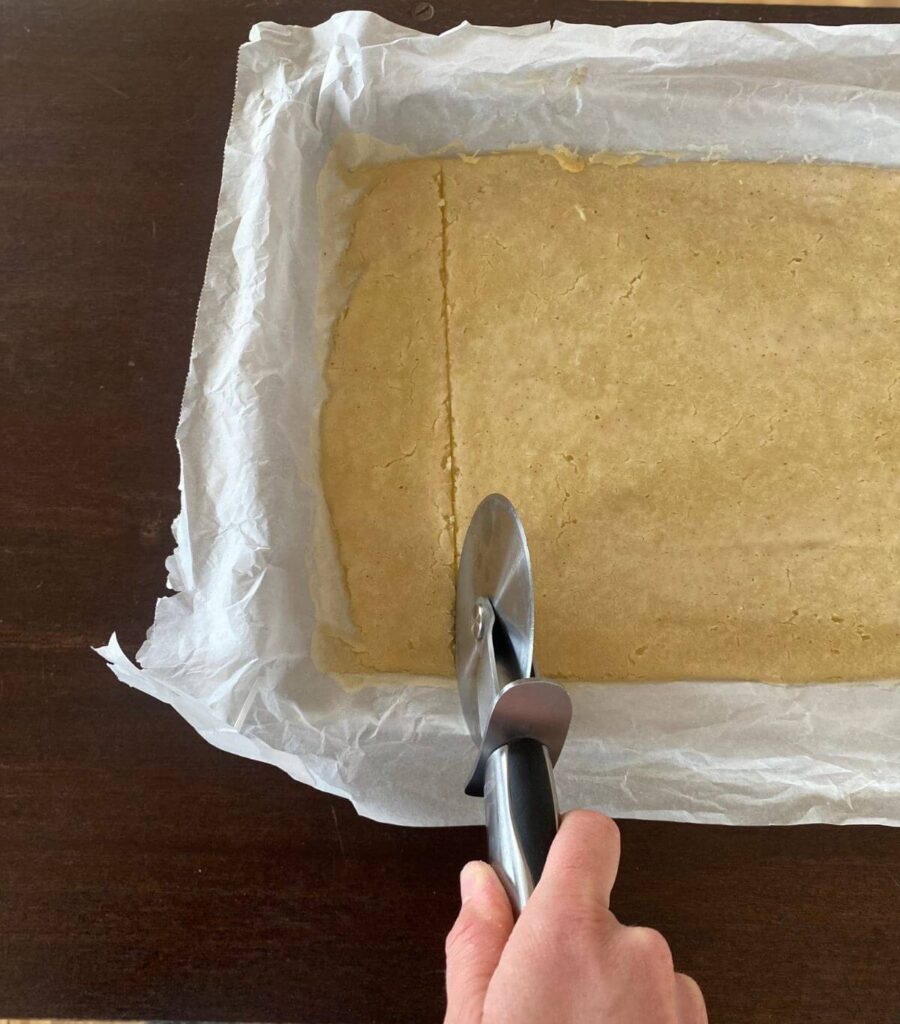
- Bake the batter for 10 minutes, then remove to cut and score. Use a pizza cutter to cut lines vertically and horizontally, making squares. Then poke holes in each square with a skewer.
- Bake the crackers for another 30-40 minutes or until golden brown. Baking time may vary by oven. Note: The longer you bake, the crispier the cracker!
- Let the crackers cool to room temperature before breaking them apart.
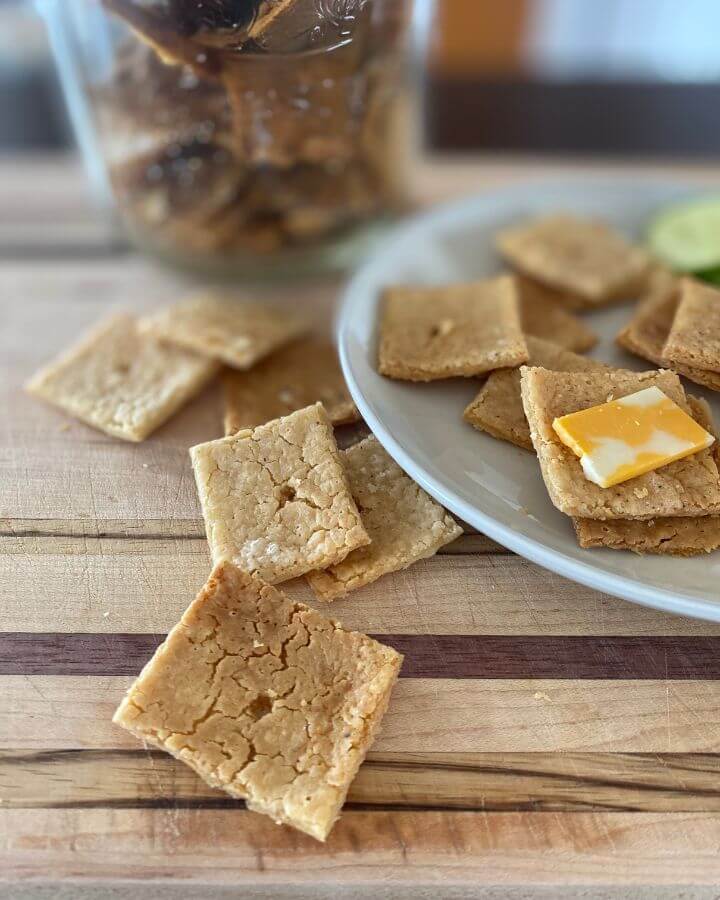
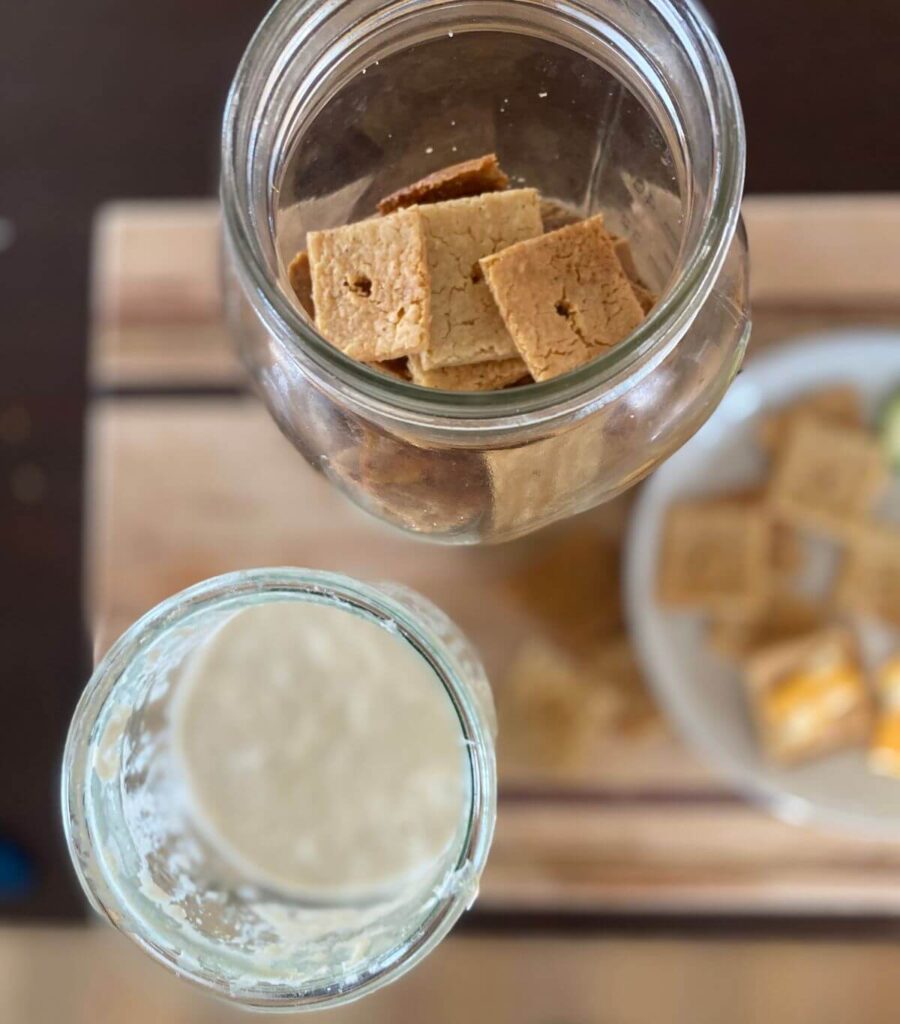
- Store in an airtight glass jar or container for up to 2 weeks.
Notes
- If you’re not using coconut oil, just replace its measurement with butter!
- Tips for crispy crackers: Thin batter and longer baking time 😉
Ingredients for Sourdough Discard Crackers
Sourdough discard
Butter, melted and cooled to room temperature
Coconut oil, melted and cooled to room temperature
Sea salt
Optional: herbs, cheese, seeds, etc.
Equipment Needed
Baking sheet – I prefer stainless steel.
Parchment paper
Large measuring pitcher – Any bowl can be used but this minimizes dishes.
Tablespoon
Half tablespoon – Helpful but you can use your tablespoon.
Pizza cutter – For quick and easy cutting.
Skewer – For quick and easy scoring.


How to Make Sourdough Discard Crackers (Crispy Every Time)
1. Preheat the oven to 325°F.
2. Line your baking sheet with parchment paper.
3. Melt the butter (and coconut oil if using). You may want to melt them separately to avoid burning.


4. Let the butter and coconut oil cool to room temperature.
5. Combine sourdough discard, butter and coconut oil in a measuring pitcher or bowl and mix well.


6. Pour the batter onto the prepared baking sheet. Lift the baking sheet one side at a time to let the batter slowly spread out into an even layer.
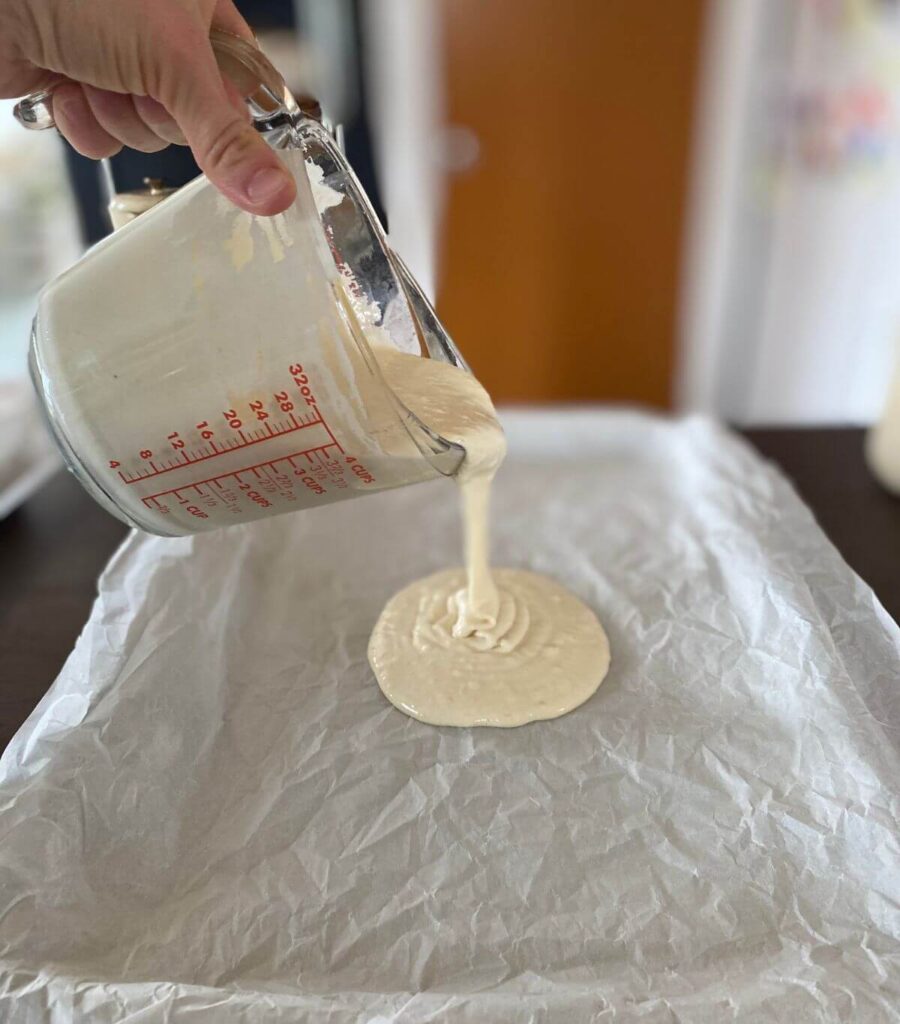


7. Use a spoon or spatula to spread the cracker batter out further, about 1/8″ thick. Note: Thin batter is one of the keys to crispy crackers!

8. Sprinkle sea salt evenly over the batter.
9. Bake the batter for 10 minutes, then remove to cut and score. Use a pizza cutter to cut lines vertically and horizontally, making squares. Then poke holes in each square with a skewer.


10. Bake the crackers for another 30-40 minutes or until golden brown. Baking time may vary by oven. Note: The longer you bake, the crispier the cracker!
11. Let the crackers cool on the baking sheet before breaking them apart.

12. Store in an airtight glass jar or container for up to 2 weeks.
Tips for Crispy Crackers

- Spread your cracker batter evenly to a thickness of 1/8″. The thinner the batter, the crispier the cracker.
- Bake your crackers until they are golden brown. The longer you bake, the crispier the crackers will be.
- Know your oven. Each oven is different and some do not have a convection option. You may need to rearrange your racks or alternate baking sheet positions to prevent burning.
FAQs
How do you store sourdough discard crackers?
Sourdough discard crackers are best stored in an airtight glass jar or container.
How long are sourdough discard crackers good for?
If stored properly, sourdough discard crackers can keep well for 2 weeks. If they start to smell or taste stale you may want to throw them to the chickens.
Can you add seeds to sourdough discard crackers?
Of course! These crackers are so versatile, almost anything can be added to them. Try sesame seeds, fresh herbs, crushed almonds, or even cheese.
Can you freeze sourdough discard crackers?
Yes, sourdough discard crackers freeze quite well. Let the crackers cool completely before sealing them in an airtight bag or container. After thawing, bake the crackers 5-10 minutes at 300°F to revive their crisp!

Need more for your charcuterie board? Try my Fermented Carrots Recipe or Venison for Dinner’s Fruit Dip.
I made these crackers for the first time today and they are delicious! I baked them for 35 minutes and they came out nice and crunchy. I used ghee instead of butter and added “everything bagel” seasoning to the mix. I didn’t have a skewer so I skipped the scoring part and simply cut them at the 10 minutes. I think these will even be good as nachos with salsa! Definitely need to bake a double batch next time!
Yay!! I’m so glad they worked out and thank you for the substitution tips!