
This post may contain affiliate links.
This fermented carrot recipe is so easy you’ll be making them on the regular. They have the perfect crunch, making them a satisfying and healthy snack any time of the day.

Are you new to fermented foods?
Carrots are a great place to start fermenting because they’re not only delicious and easy to make, but they also make a great side to any meal.
The tangy flavour can take a little getting used to, but soon you’ll be convincing your friends and family to get fermenting as well!
Ingredients:

Carrots – I like to use organic, but if not I’m sure to wash them very well
Sea salt – We use unrefined and unprocessed sea salt
Water – filtered is best
Garlic (optional) – feel free to experiment with herbs and spices to adjust the flavour
HOW TO MAKE FERMENTED CARROTS
1. Rinse the carrots. If not organic, a baking soda and vinegar bath should do.
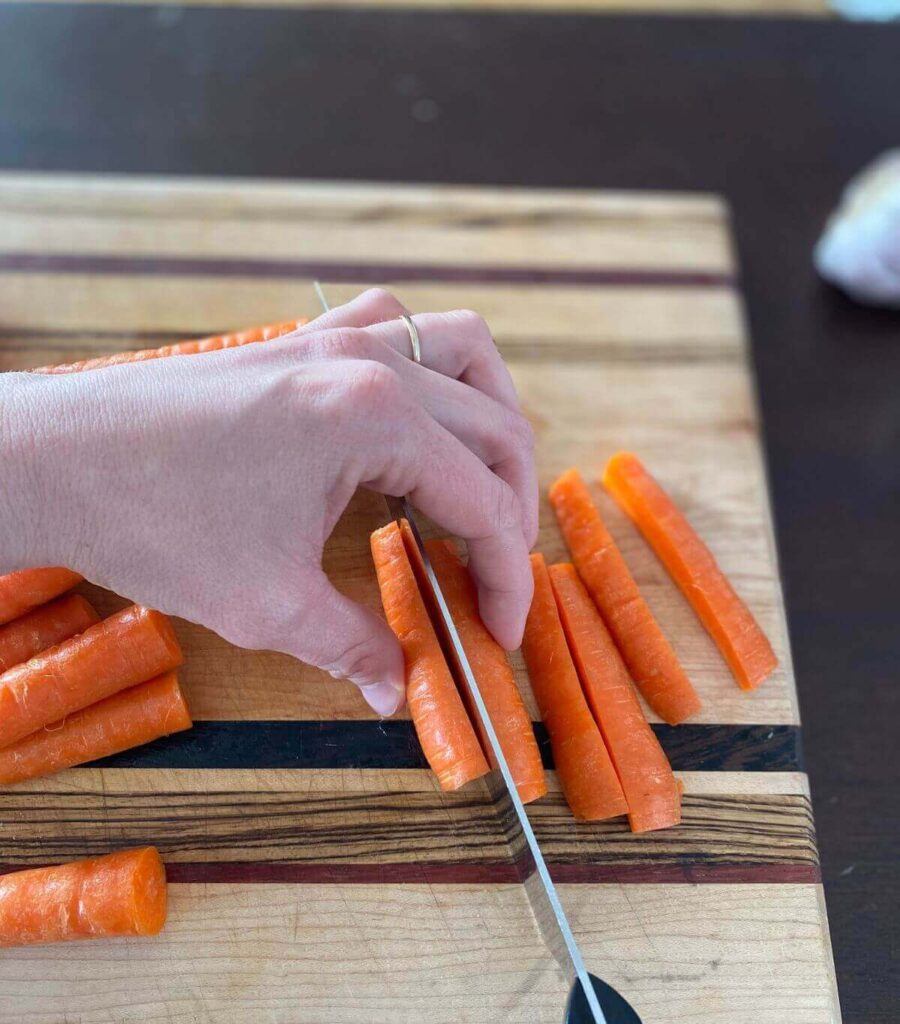
2. Remove the stems (or don’t!) and cut the carrots lengthwise into quarters.
3. Arrange the carrot quarters vertically into a large mason jar.

4. Peel the garlic cloves.
5. Add the garlic cloves, pushing them down in between and beside the carrots as far as possible.


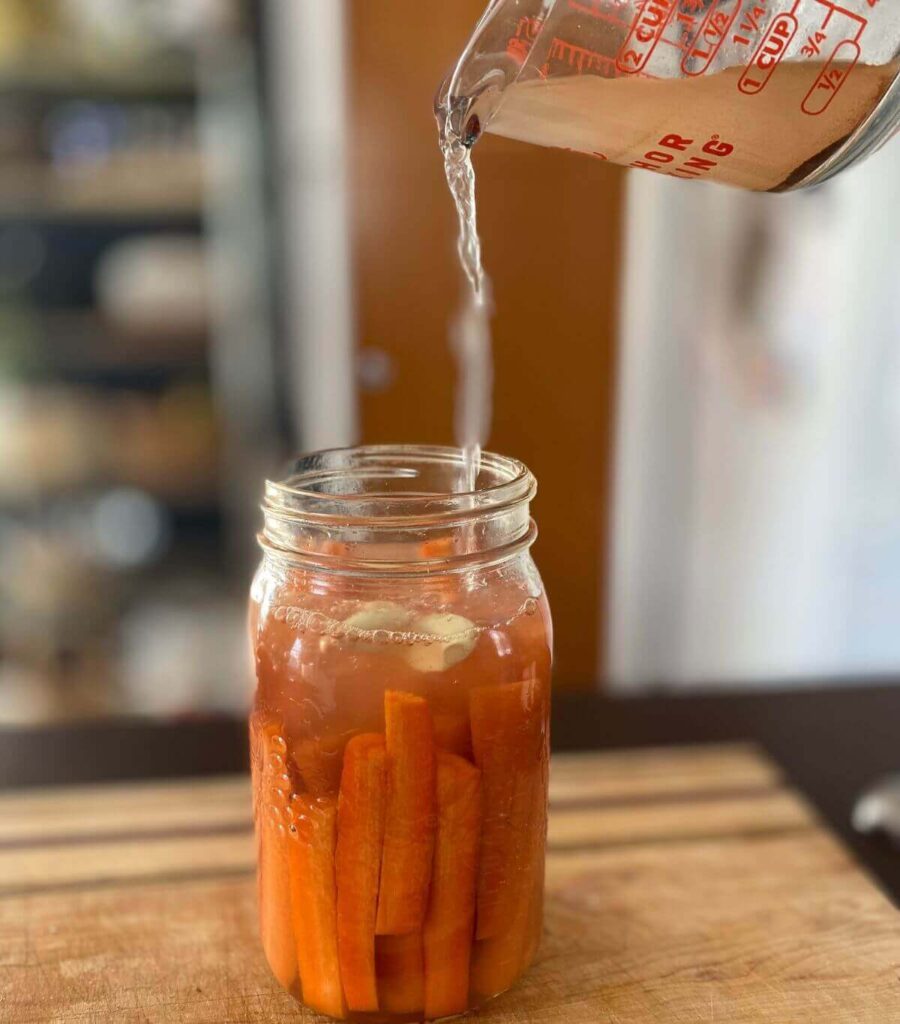
6. In a separate bowl, add the water to the sea salt and stir until the salt dissolves.
7. Pour the salt water over the carrots.

8. Add more water if needed – the contents must be completely submerged.
9. Add a fermenting weight to ensure the contents stay under the water. If you don’t have a weight, you can use a rock inside a zipper-seal bag or a cabbage leaf – get creative!


10. Give the rim a wipe and cover your carrots with a tea towel or cheesecloth and secure it with a rubber band. If you choose to close the jar with a lid, be sure to “burp” them daily (see FAQs).

Tips for Fermented Carrots
- Place a bowl under your carrot jar to catch any leakage
- Monitor your carrots to make sure they are fully submerged in the water!
- Save your scraps in a zipper-sealed bag in the freezer for future vegetable broth!
FAQs
How long do fermented carrots last in the fridge?
Did you know that fermentation was one of the first methods of food preservation? Along with dehydrating and smoking, fermentation was a way to preserve food long before refrigerators and freezers came into play.
Fermented carrots can last as long as one year in the fridge if stored properly! Be sure that all the contents are fully submerged in the water and that you used clean utensils and a clean jar upon preparation. It’s good practice to check on your carrots occasionally for foul odours or mold.
How do I know when my fermented carrots are ready?
Environment: It can take 3 – 7 days for your carrots to ferment, however it depends on the temperature of your home. The warmer the environment, the faster the fermentation process.
Preference: If you prefer a milder flavour with a crunch, you might move your carrots to the fridge after 3 days to significantly slow the fermentation process. The longer you ferment them, the softer and more tangy they will become.
Are fermented carrots good for you?
Of course! Fermentation transforms healthy food into turbo healthy food. Let me explain:
Basically, the carrots are digesting themselves. The natural bacteria and yeast on the carrots EAT the carrots’ sugars and starches, making it easier for you and I to digest!
Not only that but the process introduces sooo many bioavailable minerals, vitamins, amino acids and beneficial bacteria (probiotics!) to our gut. A healthy gut means a healthy human.
Why are my fermented carrots slimy?

Slime, dark sediment and fizzy bubbles are very normal characteristics of ferments. It’s all part of the process!
Even mold will sometimes appear if all the contents are not submerged in the water. You can skim off any unwanted white, greenish or cloudy liquids sitting on the top without a worry.
In my experience, the longer the fermentation, the slimier the carrots. This is not bad, but if you would prefer a non-slimy carrot, you can transfer your jar to the fridge around day 4 (maybe sooner in warm climates).
Do you need a lid for fermented carrots?
You do not need a lid for fermented carrots, but you do want to keep the bugs and dust out. Just remember, whether you’re covering your jar with a cheesecloth or closing tight with a lid, the contents must be fully submerged in the water to prevent contamination.
Tea towel or cheesecloth: The more traditional method of fermentation is to cover ferments with a tea towel or cheesecloth. Having an open airway allows the natural bacteria and yeast from the environment to work with the contents being fermented.
Closed lid: If the jar is airtight they must be “burped” every day. This means you open the lid to release gas build up.
A closed lid creates an anaerobic (oxygen-free) environment which can reduce the risk of mold and maintains a healthy CO2 buildup. You just might have some leakage, so put a bowl under your jar!
Wanna ferment something else? Check out my easy sauerkraut recipe or try your hand at homemade kombucha! You can also find more fermentation recipes with simple instructions here.

Fermented Carrots Recipe
Equipment
- 1 jar
- 1 tea towel, cheese cloth or lid
- 1 fermentation weight (optional)
Ingredients
- 1 lb carrots
- 3 tbsp sea salt
- 3 cups filtered water
- 5 cloves of garlic optional
Instructions
- Wash the carrots
- Remove the stems and cut the carrots lengthwise into quarters
- Arrange them vertically into a large mason jar
- Peel the garlic cloves.
- Add the garlic cloves to the jar
- In a separate bowl, add water to sea salt and stir until the salt dissolves
- Pour the salt water over the carrots
- Add more water if needed – the contents must be completely submerged
- Add a fermenting weight to ensure the contents stay under the water (if you don't have a weight, see Instructions)
- Give the rim a wipe and cover your carrots with a tea towel or cheese cloth and secure with a rubber band. If you choose to close the jar with the lid, be sure to "burp" them daily (see FAQs).
- Ferment for 3-7 days or for your preferred amount of time (see FAQs).
Notes
- Be sure to save your scraps for vegetable broth
- If you prefer to use a lid, be sure to burp daily! (See FAQs)
- Monitor your carrots to ensure they are fully submerged
How did I not know it was this easy?! Ferments always intimidated me but you’ve convinced me to start trying!
Yay! You’ll be hooked 😉
Can’t wait to make these for my son! Love the step by step instructions and pictures 🙂
So glad it’s helpful! ❤️
So much knowledge I was unaware of. I will definitely be trying this out 🙂
Yay! Let me know if you have any questions 🙂